I am really pleased with how my autonomous vehicle project has turned out. I wanted it to be a service that was needed. People, especially the elderly, who have difficulty getting around from place to place and to health appointments in particular - it can be a big struggle for them.
This is why I created this idea. My Granda had a lot of appointments to go to for his diabetes, lung function and his CAD and over time he couldn't drive himself to these appointments. My parents had to take time off work to take him to these appointments.
So, I decided that a taxi service for the purpose of driving people to medical appointments would be very beneficial and especially the 4 testing services that are conducted in the vehicle.
What I would add to this project if I were to do it again, I would make the traffic light system for the doctor more prominent in the data collection results. Red for dangerous result, amber for concerning, and green for good result. I would put those results in a box of that colour.
I would also probably change the font from Inder and Inter of the titles in the companion app to FinalSix in Adobe fonts as it is a natural curvy and friendly font and I am trying to portray a friendly and trust worthy service
Click here if you would like to see more about this project in my blog.
Reflection
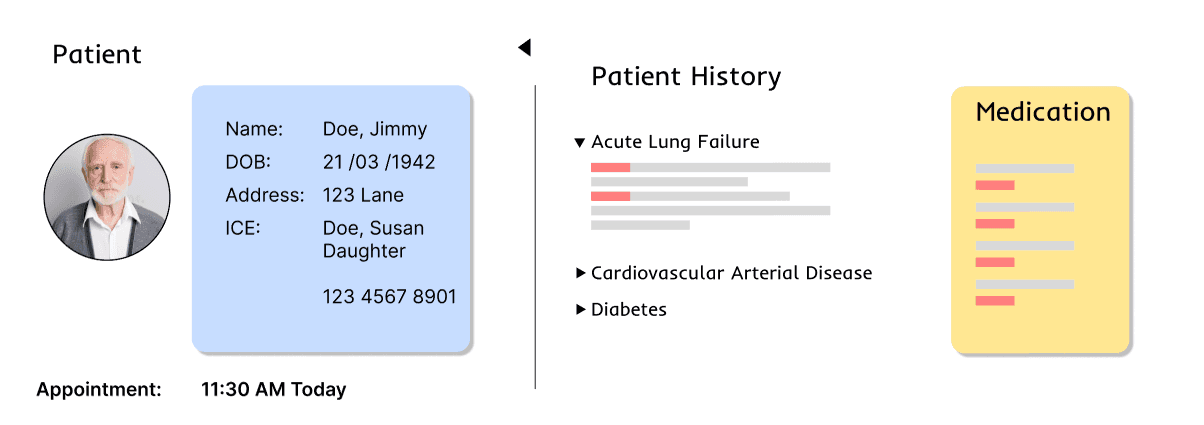
Patient History
Data
Appointment
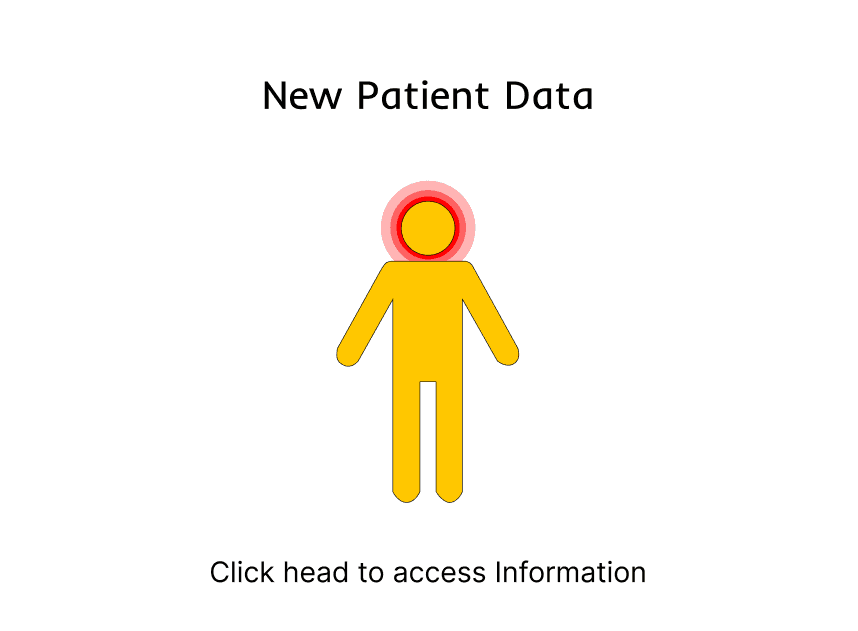
Home Screen
This screen is the Patient History tab - here contains the patients medical history from all diagnosis' to prescribed medication.
Under each diagnosis will contain their history on what they have been treated with and the rate at which the diagnosis is progressing at.
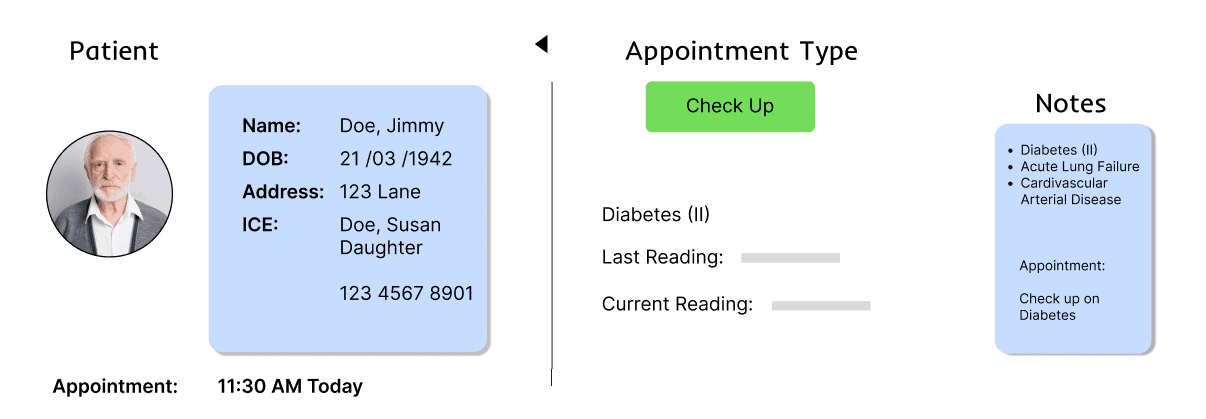
The next screen is Data- this is what was collected in the autonomous vehicle and it has been sent through to the doctor before the patient arrives.
It shows the blood pressure, glucose levels, oxygen levels and body temperature.
The orange dot represents that the glucose levels are getting high for the patient especially since they have diabetes. This just lets the doctor know if any results look concerning.

This is what the Doctor will see when they click on to the appointment and there they will see they type of appointment and what they are here for eg a diabetes check up.
On the far right is the notes section which contains underlying health conditions the patient has.
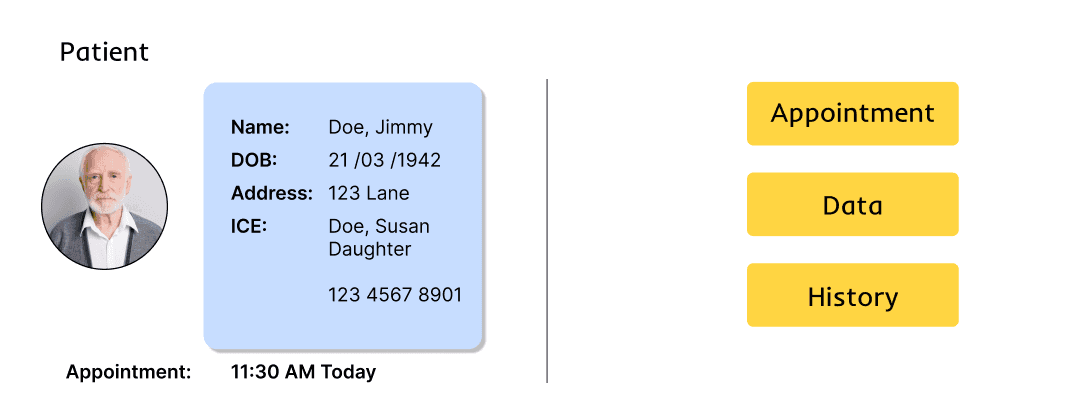
This is the Patient Information Screen- on this screen contains the patients details such as name, date of birth, address and emergency contacts details.
It also contains an image of the patient so they know who the individual is (there may be someone with the same name as them) and also the time of the appointment.
On the right hand side there is 3 main sections:
Appointment- What type of appointment (check-up etc) and what the appointment is regarding (diabetes etc).
Data- The data collected from the autonomous vehicle.
History- The patient's history.
When the data is collected form the autonomous vehicle, it is then sent to the doctor where they can view it before, and during the appointment.
They are able to check the results of the patient and therefore saving them time having to carry out tests and allows the doctor to get to the more important topics of discussion with the patient.
For example:
How the patient is doing with certain medications?
What medications need changed?
What procedures need arranged?
etc.
The doctor will be faced with this screen. They can access the new alert by tapping on the head of the figure on the screen which will take you to the patients information screen: